Printing Microservice Setup
1. From the wizard(posow-sb.erply.com),
Choose Hardware
Installer App
(debug) Micro-service Manager.
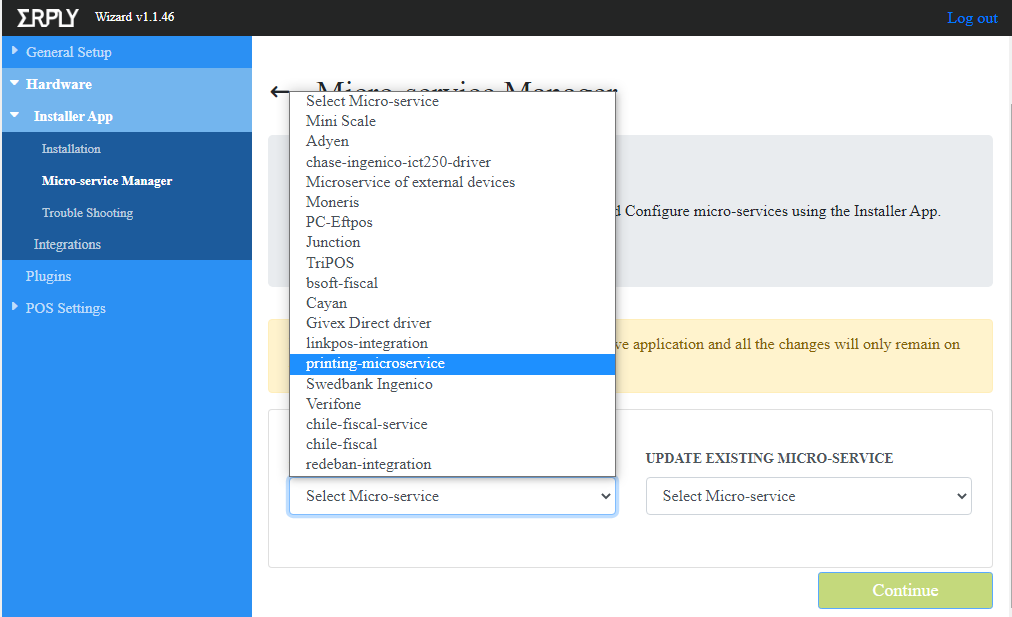
2. After which it'll display ADD NEW MICRO-SERVICE
where you can choose printing-micro-service and press CONTINUE.
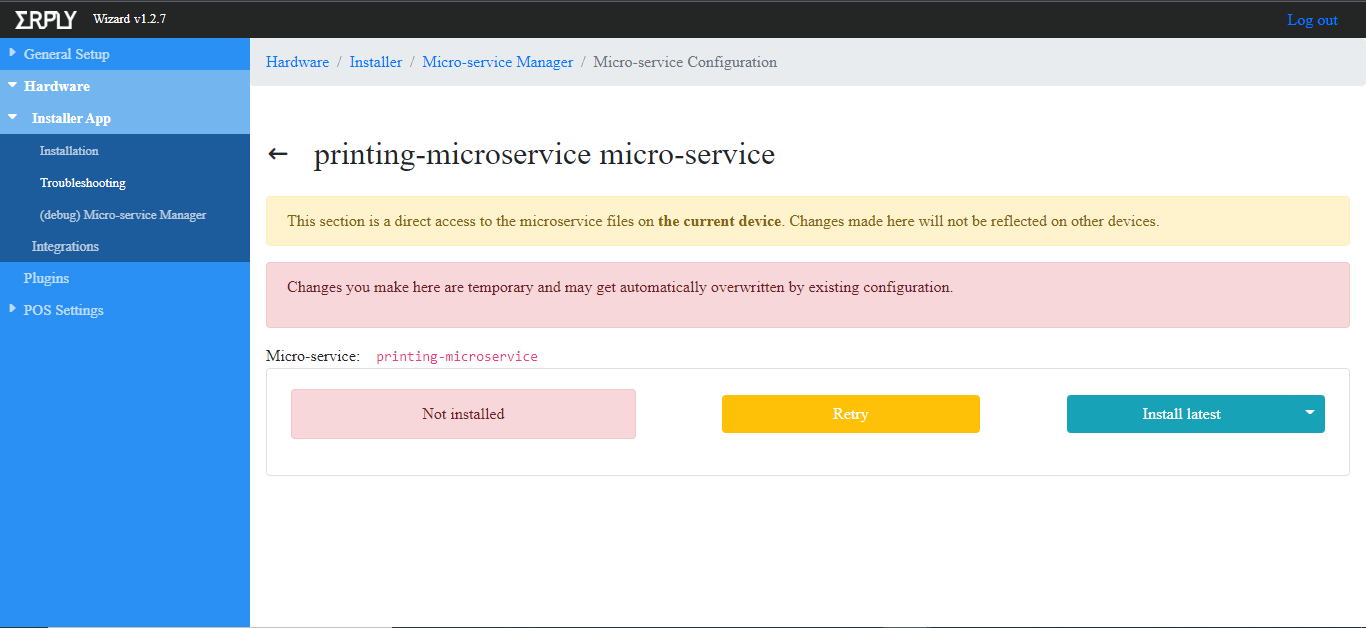
3. After that it'll display “printing microservice micro-service”, press “Install Latest”.
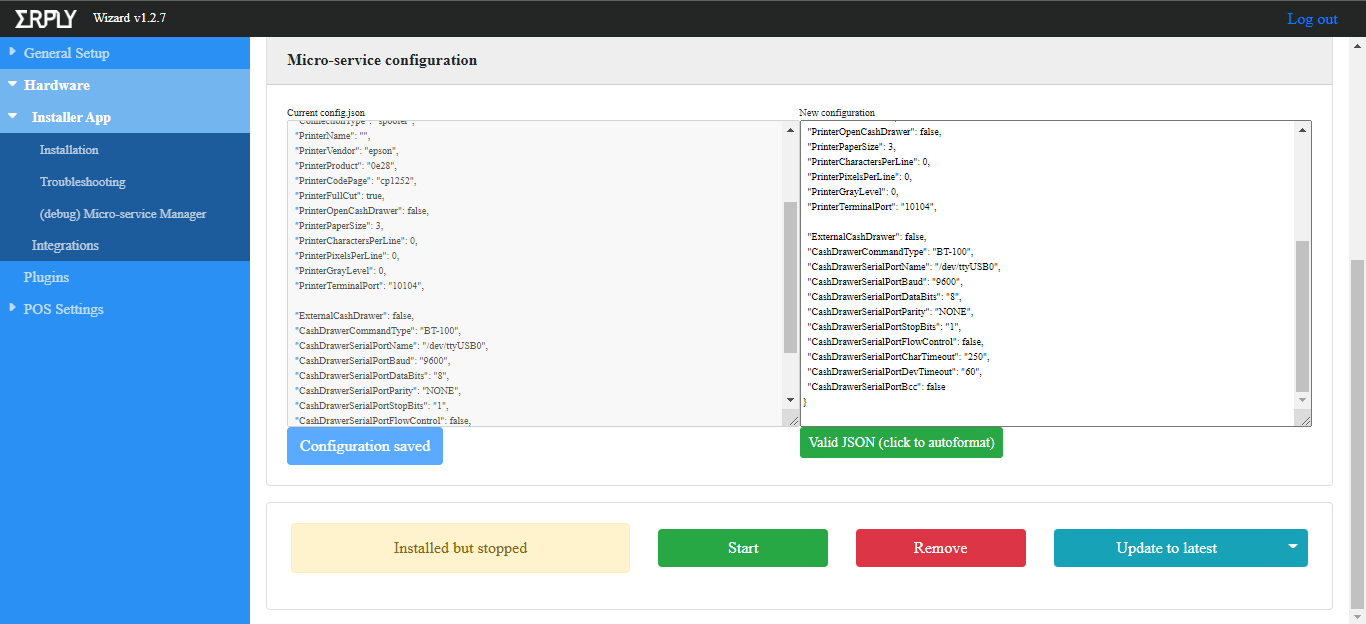
4. When “printing micro-service” is installed you need to press "Start”
5. Then it'll display “Installed and started”
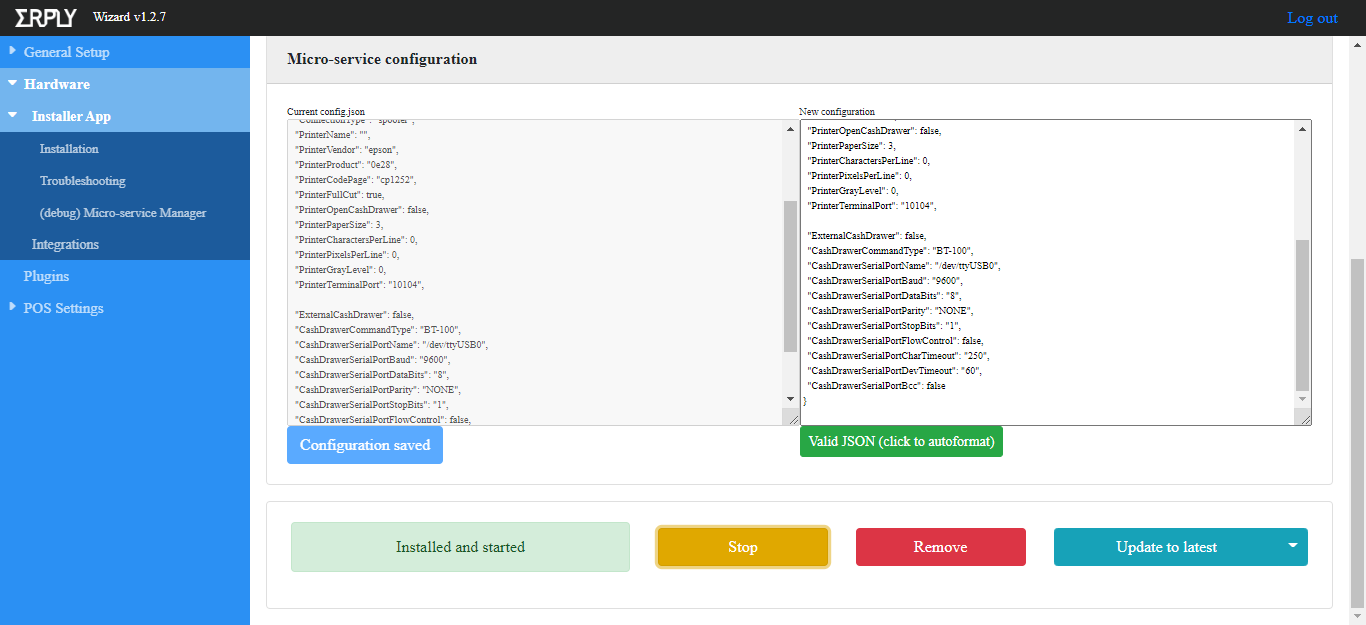
6. Now that Printing Micro-Service is working,
you need to go to Hardware
Installer App
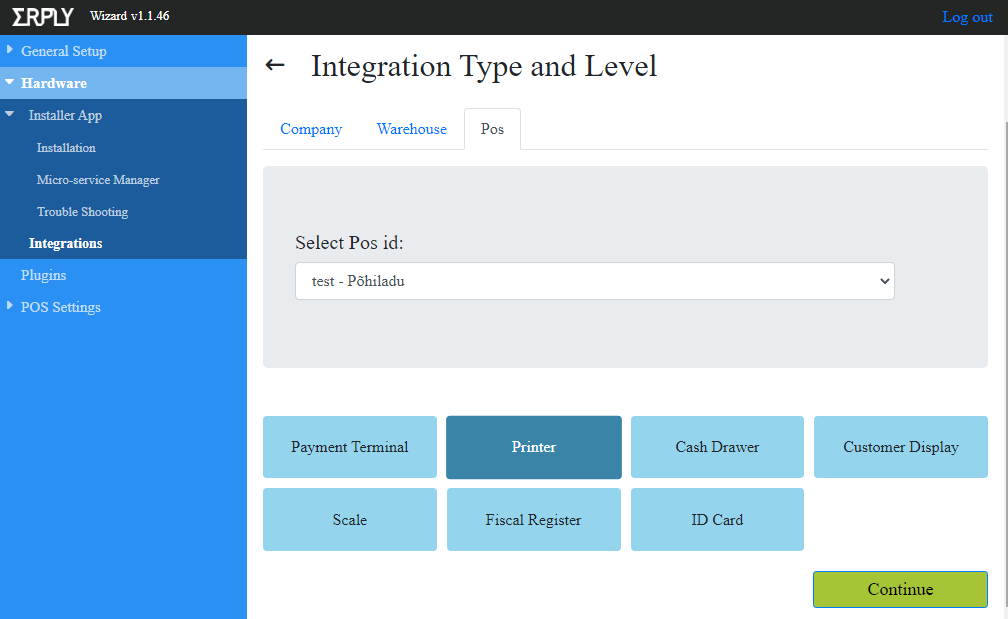
Integrations and choose if you want to connect the printer to the company, warehouse or to the cash register.
Press “CONTINUE”
7. Click the row “Golang printing micro-service” press on the slider
Click on the words “Golang printing micro-service” to expand the menu
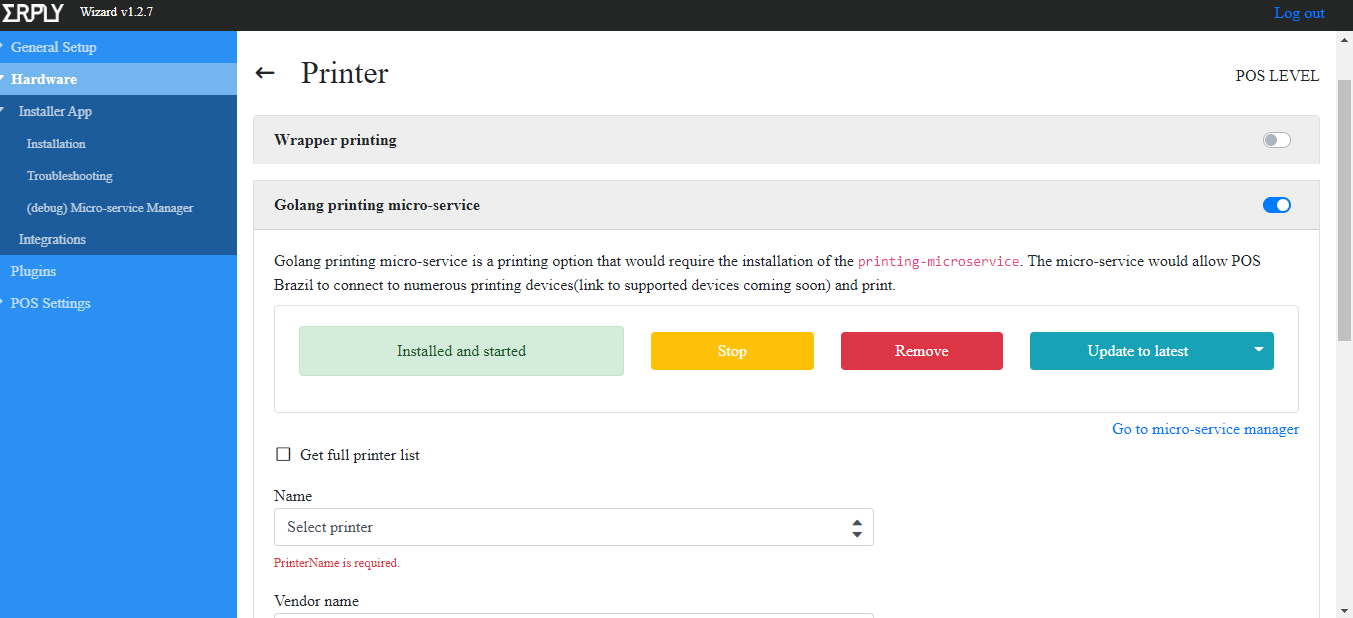
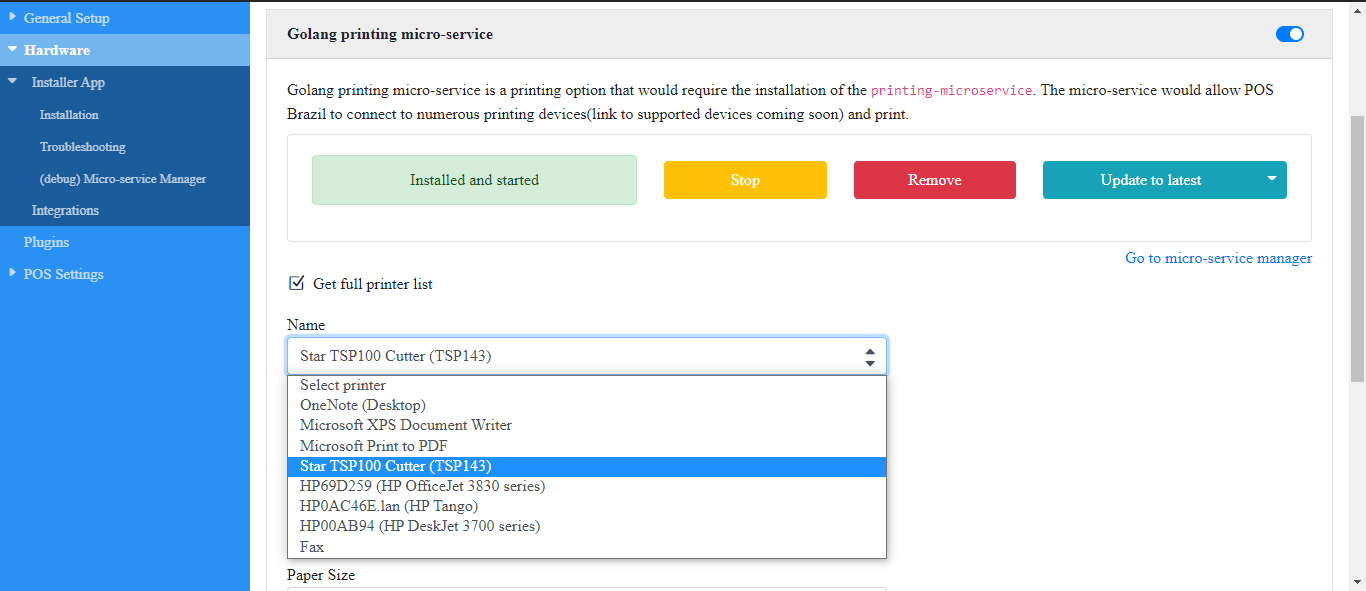
8. Check the “Get full printer list” box
9. Select your receipt printer from the list.
NOTE: If you do not see your printer listed, please check under your the computer settings to ensure your printer is connected.
10. Select the printer brand under "Vendor name".
NOTE: Not Required For Windows.
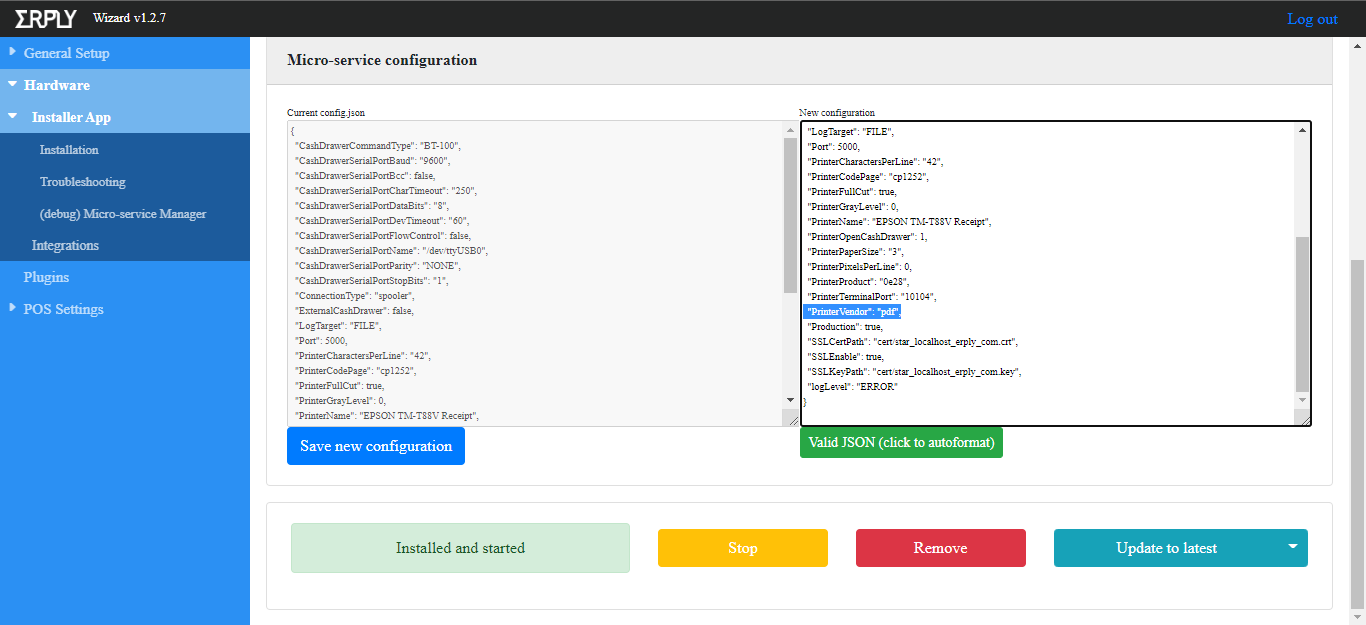
⚠️ When setting up a Star printer on MacOS, the "Vendor name" must be set manually in the config file to "pdf" instead of "star".⚠️
10.1 [MAC ONLY] Head to Installer App > (debug) Micro-service Manager
10.2 Under “Update Existing Micro-Service”, select printing-microservice and press continue.
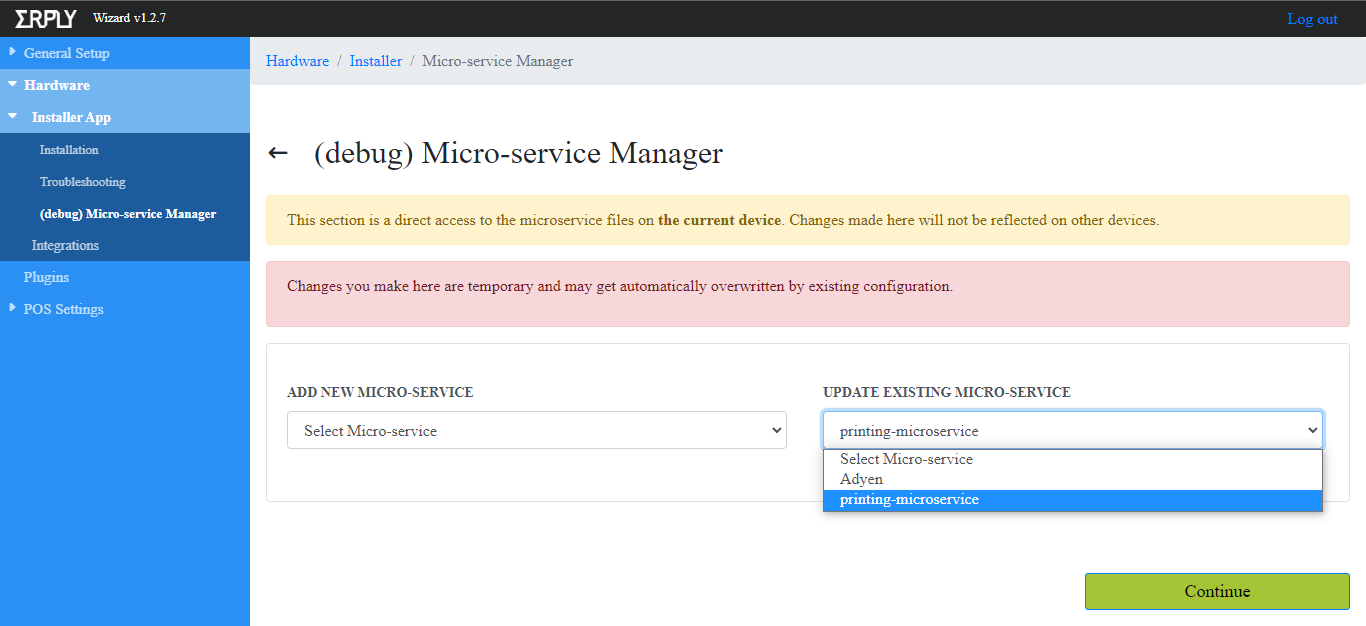
10.3 Under “New Configuration” change the “star” of “PrinterVendor” to “pdf” as shown below.
10.4 Press “Save New Configuration”
11. Review the other printing options:
- Full Cut: full cut between documents (receipts)
- Open Cash Drawer: triggers the cash drawer opening after each printing request (any receipt, regardless of tender)
- NOTE: If left unchecked, cash drawer opening can be controlled within the POS in more detail.
- For Example: You are able to set the register to open only on cash sales.
- Paper size: in inches, 2 or 3
- Characters Per Line: may be set to 0, in this case default values will be used (Bixolon: 3”=42, 2”=28; Star and Epson: 3”=48, 2”=36). Change this field only if the printing layout doesn’t fit into the receipt. Try to set a smaller or bigger value until reaching a suitable result.
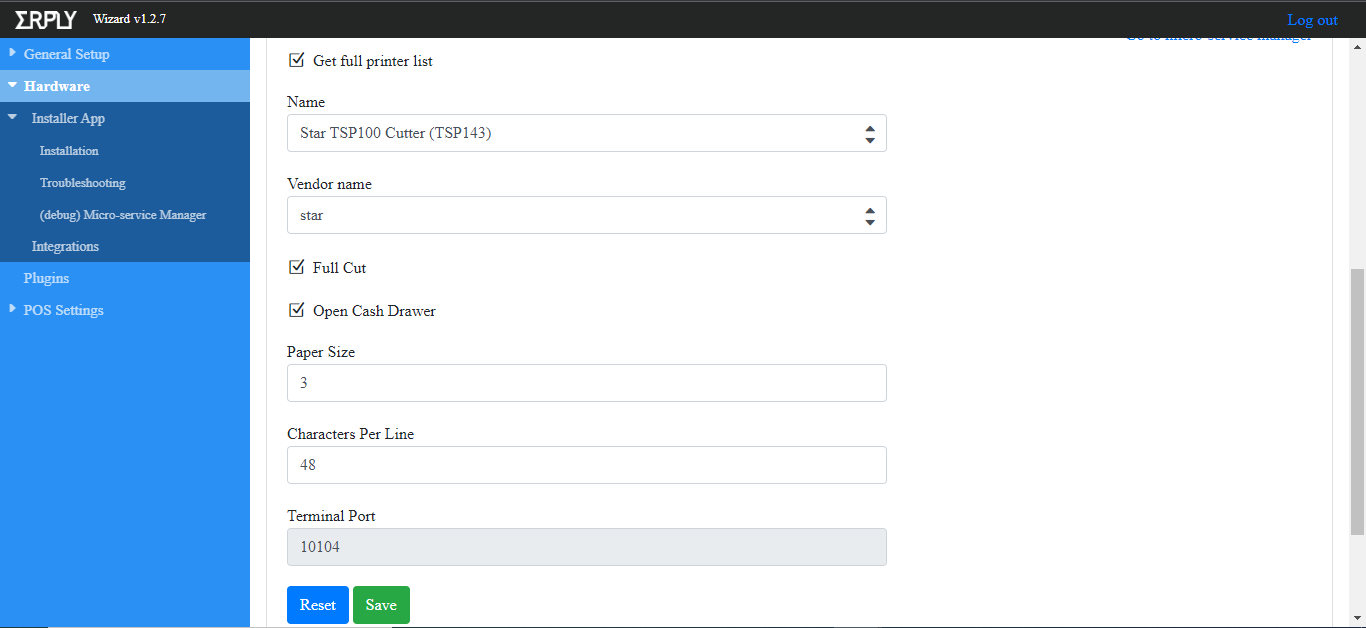
NOTE: Make sure to save the printer setting before exiting the page.
12. When the printer is installed, try to print a recent transaction to test that the printer is working.