Setting Up The Adyen Account
Go live on Terminal API
The following requirements need to be configured on the Adyen portal:
1. The terminal should be assigned to a store and boarded
1. Prepare your terminals
2. Assign terminals
3. Board terminals
2. The API key should be generated for the web service
1. Generate API key
2. The API credential/Web Service user must be assigned to the Company Account, as well as any relevant Merchant Accounts
3. Ask your Adyen contact to configure the WS user with the necessary roles.
3. The Terminal ID should be saved from the Adyen portal in the format
M400-[Serial Number Without Dashes]
4. Enable terminal API should be enabled
1. Enable terminal API
5. Enable Websockets should be enabled
6. Key identifier should be set to erplyKey
7. Key passphrase should be generated with 32 characters and saved.
8. Key version should be set to 0
9. User should have access the Adyen portal to be able to get the passcodes in case they need to configure the terminal.
After all the above is verified, Erply will need the following credentials to set up Adyen integration.
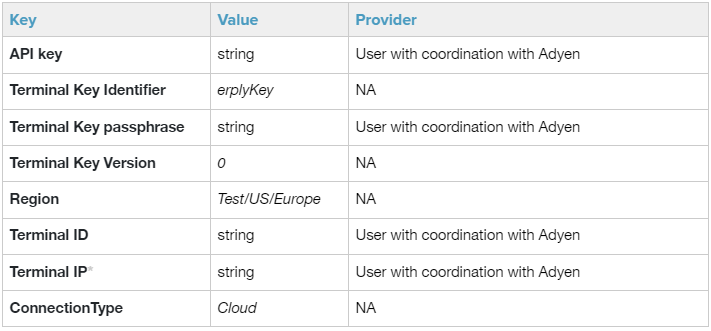
*The Terminal IP is not required for Cloud integration, which is the only integration supported by ERPLY at the moment.
Thus, Input "1.1.1.1" for the Terminal IP as a placeholder.
Other configurations such as what credit cards to allow, what logo to show on the Adyen terminal, whether to enable standalone or not, would require the user to contact Adyen.
Setup Erply
Two microservices are required for the integration to work. The first and main microservice is the “Installer”, which acts as a manager to the other microservices required to integrate between Erply and external hardware.
The second microservice is a sub-microservice that will specifically handle Adyen integration.
Click here if you need to Install the Installer
Installing the Adyen Microservice
The next step is to install the Adyen microservice that will handle communication with the Adyen payment terminal.
To install this component, navigate to https://posow-sb.erply.com/, if not already there, and follow these steps:
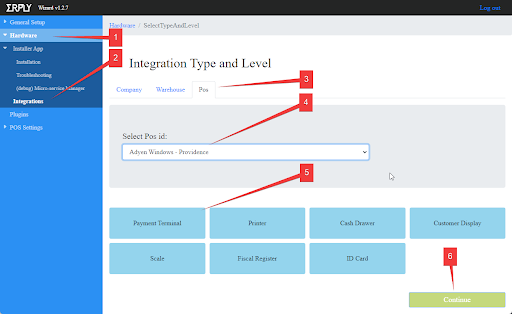
1. Click on Hardware.
2. Click on Integrations.
3. Click on the POS tab
4. Select the name of the register you are setting up from the dropdown menu.
5. Click Payment Terminal.
6. Click Continue.
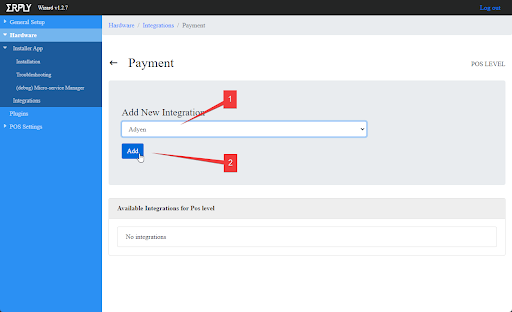
1. Select Adyen from the dropdown menu under Add New Integration
2. Click Add.
1. Click Install latest
2. Please wait for the message indicating a successful install.
3. Fill out the Adyen Credentials section and click Save.
(Make sure to check the box "Print receipt from POS general printer" this ensures all credit card information is added to credit card receipts)
Refer to the section titled “Adyen account setup” to get the credentials.
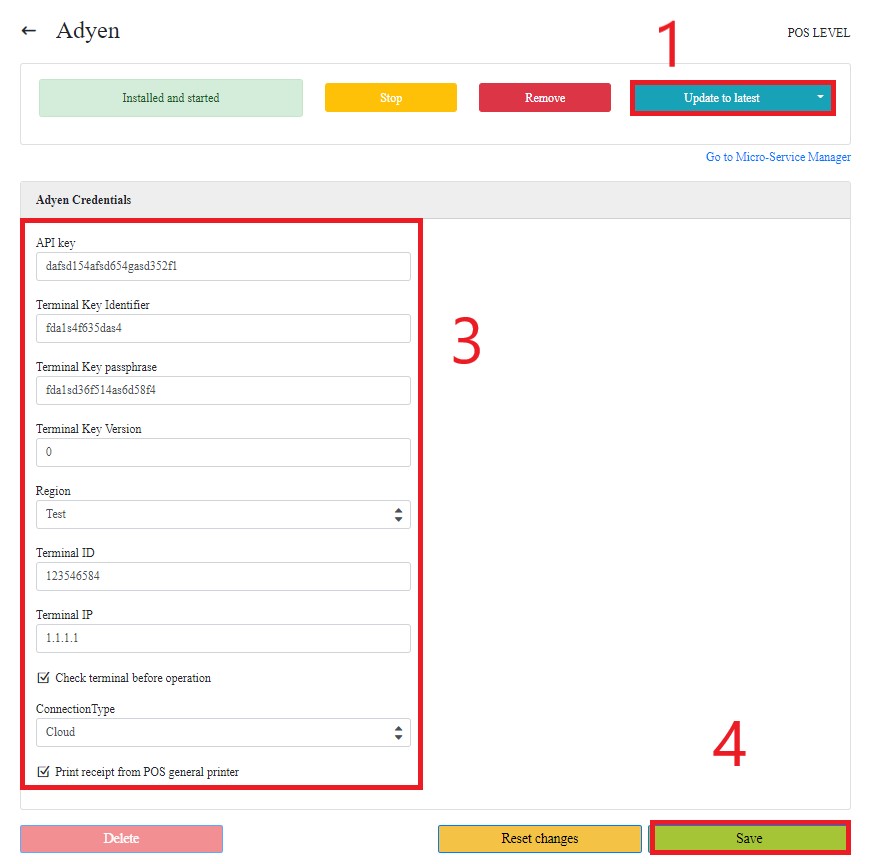
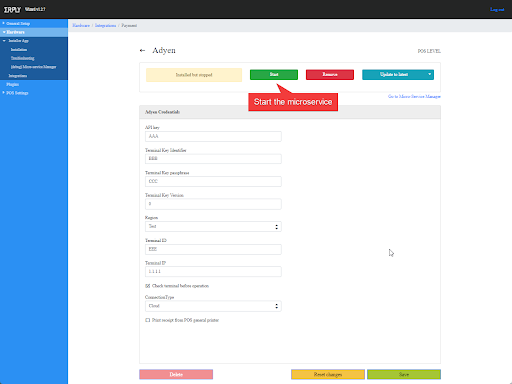
4. After installing the Adyen microservice, filling out the Adyen credentials and saving them, click on Start to start the microservice.
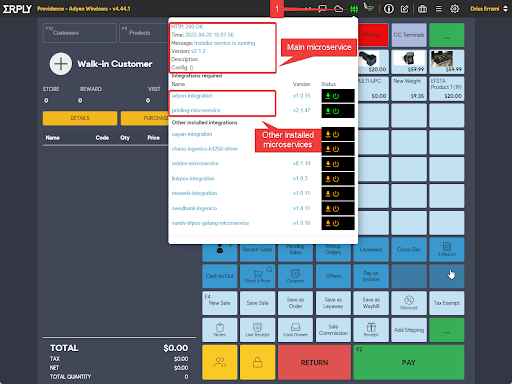
Now when you access the Service APP (service-app.erply.com) and POS (epos.erply.com), the integration indicator should now indicate that you have at least two microservices running: the main Installer and the Adyen microservice.
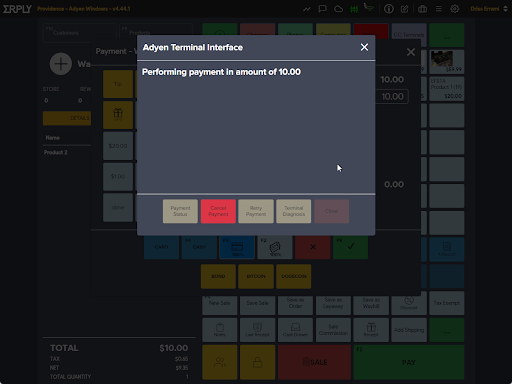
If all configurations have been set up as shown in this guide, once you add products to the card, click Pay and select the card payment option, the POS will show that it is communicating with the Adyen Terminal Interface and the credit card terminal will ask you to swipe for the amount of the sale.
